REMOVABLE HELMETS
Who doesn't love removable helmets? Yeah, toy companies love to throw in the occasional alternate head but come on, those things always end up in a bin somewhere never to be swapped again. Unless of course it's an alternate head that I painted for you then you should be displaying it proudly for all the world to see! But really, removable helmets are just cool. Why you ask? Well, huh, might as, might as well ask why is a tree good? Why is the sunset good? Why are boobs good? Man, helmets, ya stick 'em on, take 'em off, shove 'em up bullfrogs asses. They answer is, they just are.
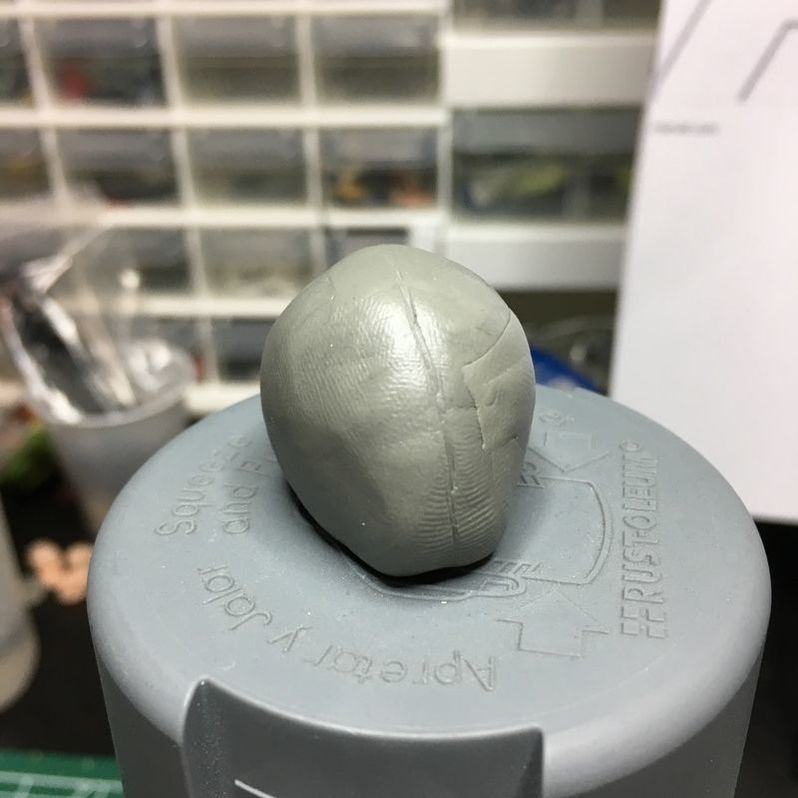
STEP ONE:
|
Get head. I mean A head. Yeah... get A head and cover it with plastic wrap. As with most of my tutorials I'm once again using Procreate Putty. I tried this with Aves but because it cures hard, any type of reveal or fold in the head will essentially lock the helmet in place making it a royal pain in the arse to remove. So take your Procreate and glob it around the head making sure you have an even overall thickness. Oh, and don't cover the peg hole, dummy.
|
STEP TWO:
|
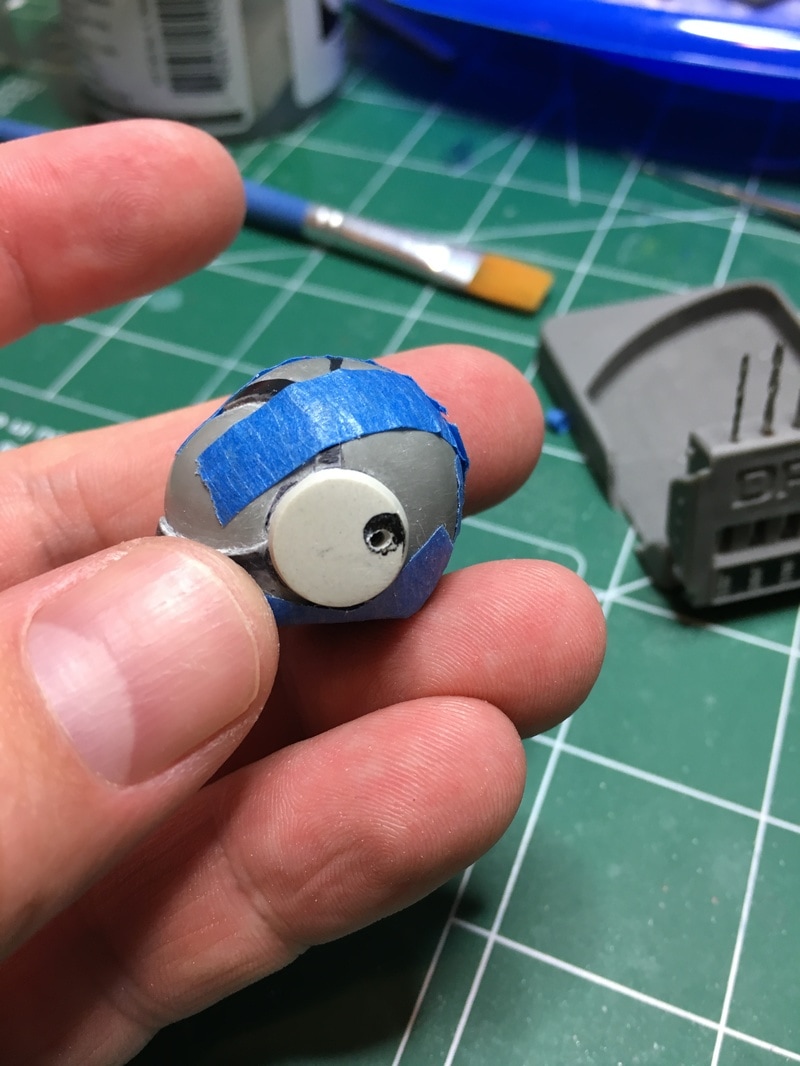
Now get out your dremel, sandpaper and a new can of whoop ass and start sanding and carving the glob until it takes shape.
Here I've also carefully cut out where Hazmat's visor will be. |
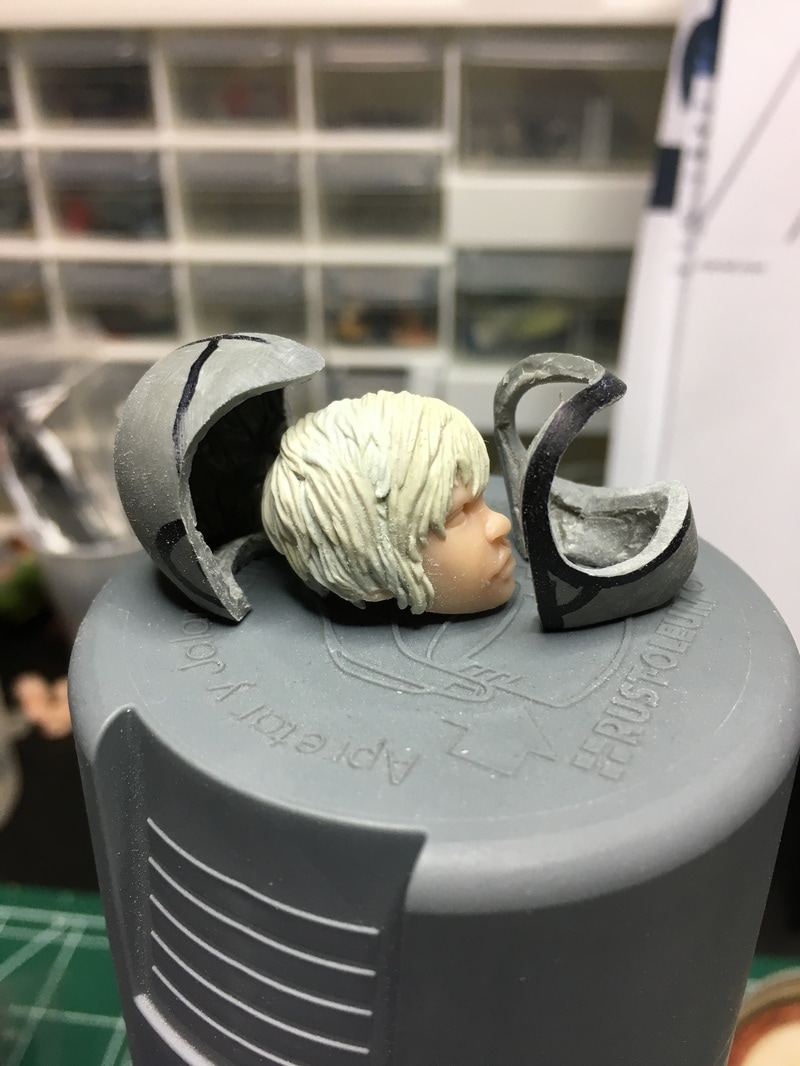
STEP THREE:
|
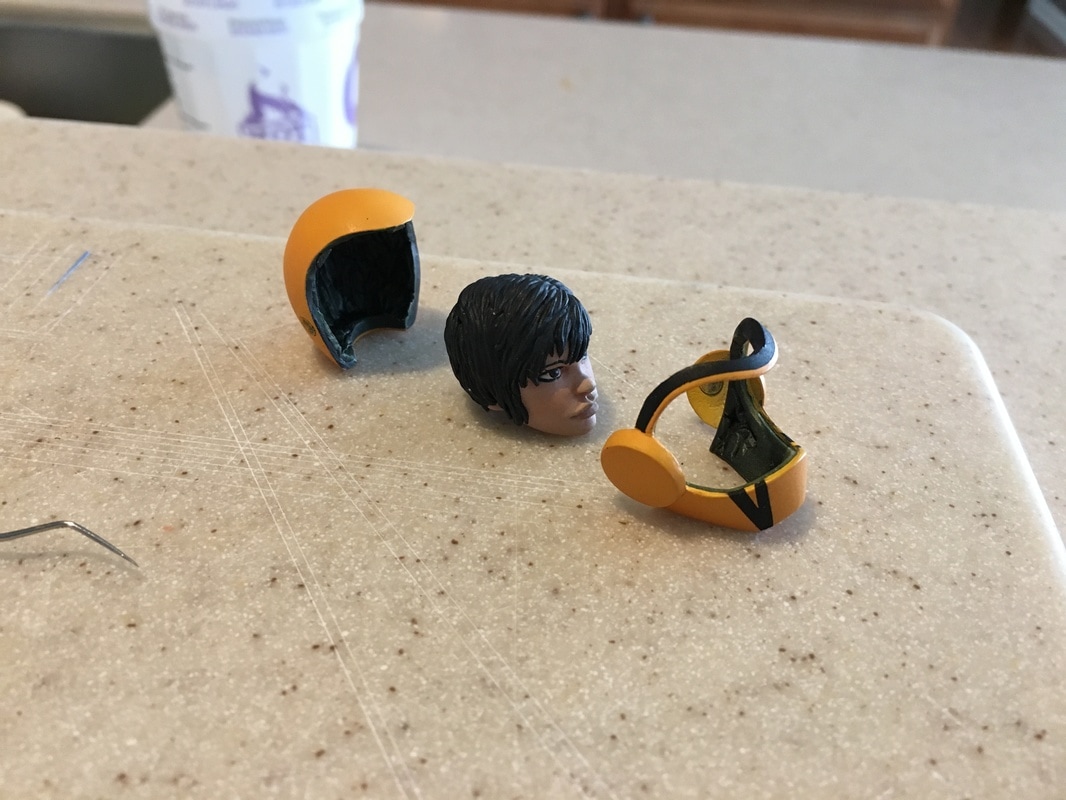
This next part is a bit tricky as you really only get one shot at it. Find a spot on the helmet's design, a seam or change in color, that will be a good place to cut the helmet in half.
Carefully cut away trying not to saw at it or use multiple stabs. The goal is a smooth consistent cut so that the pieces can be cleanly slapped back together. You'll also have to be careful not to cut up the head below. |
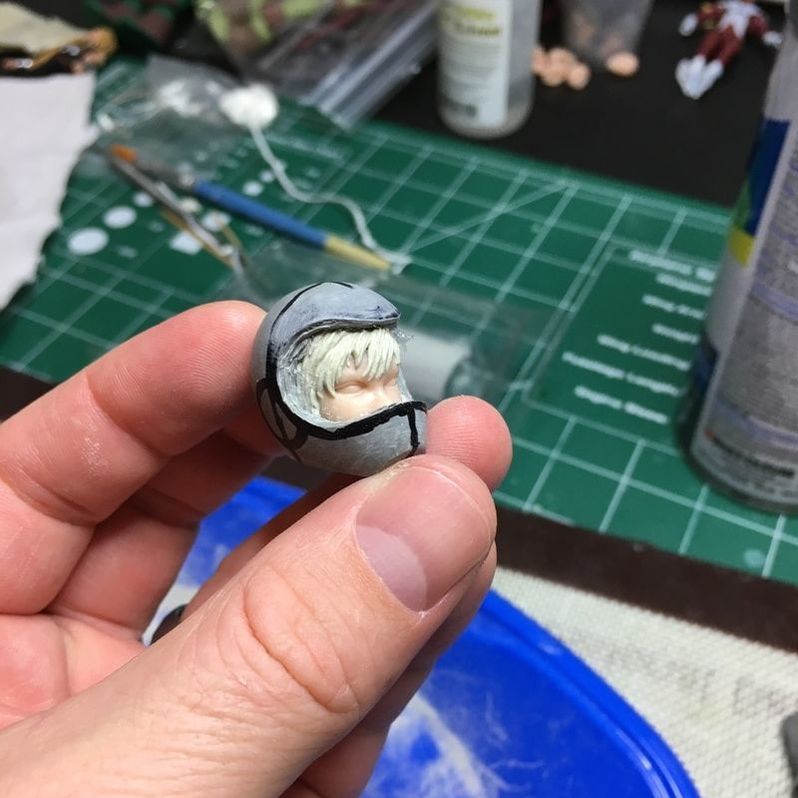
STEP FOUR:
|
Now's the time to add in extra details like Hazmat's ear-circle thingies. and her little ventilator screen.
I also sculpted back in her visor with a bit of a recess as my original goal was to cast this thing in clear plastic. But after a multitude of failed attempts due to resin not fully curing, being foggy, or losing shape, I screamed at the heavens and reluctantly gave up. |
STEP FIVE:
|
This is also the point where I added a bunch of magnets around the connection points. I have one in each ear, and I cut a few tiny magnets in half, and glued them along the inner seam so that the helmet would give me that oh so satisfying *snap* when it comes together. I'm tellin' ya. It's borderline orgasmic.
|
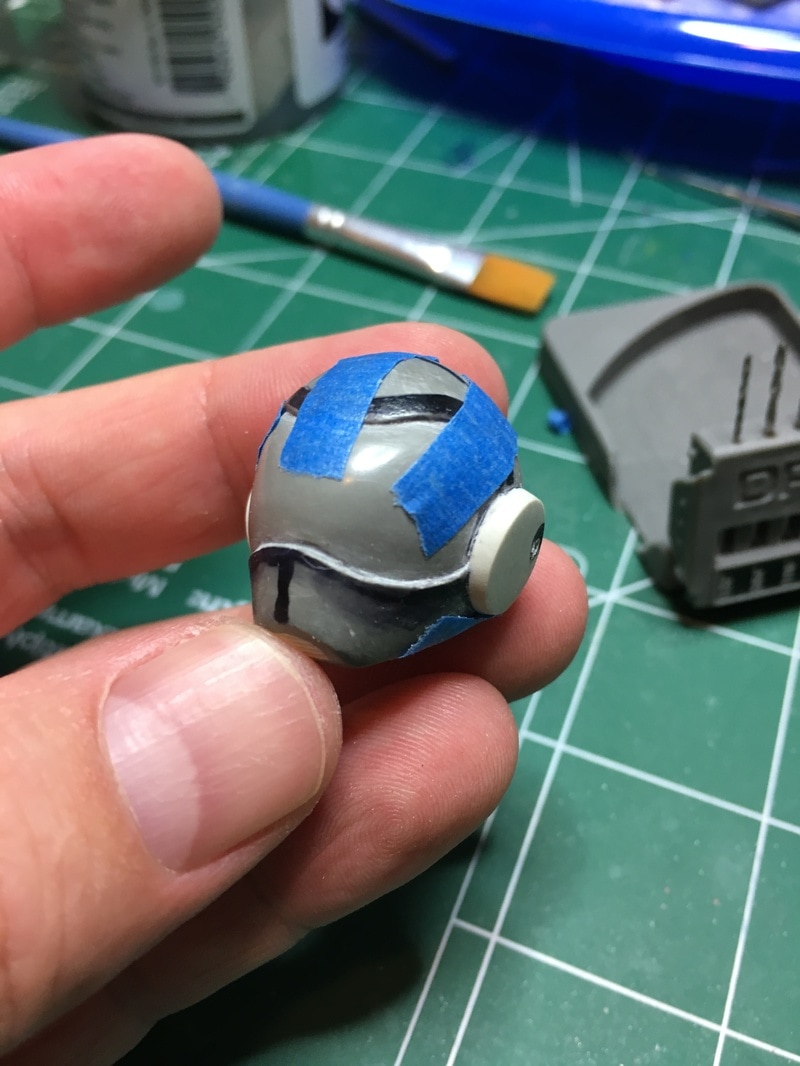
STEP SIX:
|
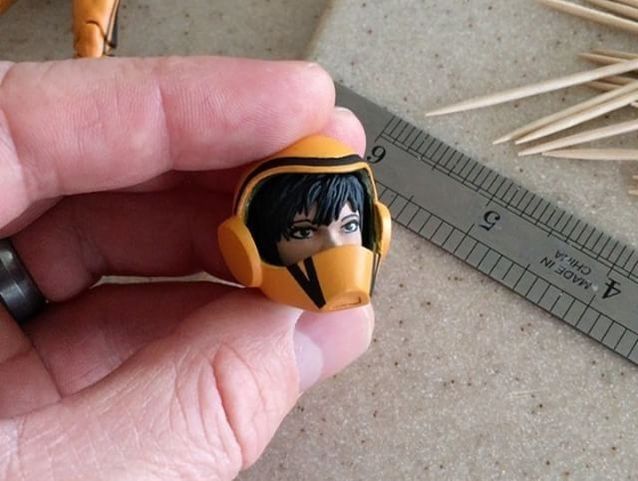
Time to paint! As you can see I cut the seam right where the black line lays across the top of her helmet so when the two pieces are together the seam is hardly noticeable.
As mentioned above the casting was a complete disaster so I cut back out the visor and ended up just taking a clear plastic cup, cutting it to shape, then using a hair dryer to carefully bend it to fit cleanly in the helmet. So, life lesson here folks. If at first you don't succeed, try a few more times, then quit, then do something totally different. Pass that on to your kids. |
|
|
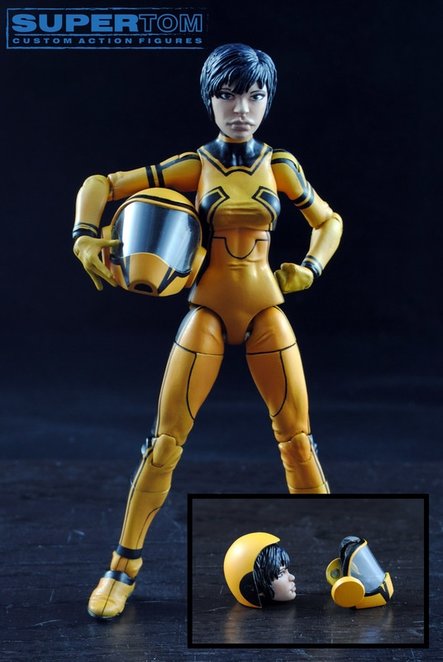
Congrats, you’re done!
If you have any questions or are just feeling lonely and want to chat, leave me a comment below!
If you have any questions or are just feeling lonely and want to chat, leave me a comment below!